Tips for Halloween pumpkin carving
Carving pumpkins is one of the most beloved Halloween traditions, turning ordinary gourds into spooky, creative masterpieces. Whether you’re a first-time carver or a seasoned pro, there are plenty of ways to make your jack-o’-lantern stand out. Here are some essential tips for carving the perfect Halloween pumpkin in 2024:

1. Choose the Right Pumpkin
The foundation of a great carved pumpkin starts with selecting the right one:
- Shape: Opt for a pumpkin with a flat bottom to ensure it sits evenly. If you’re aiming for a specific design, think about the pumpkin’s shape and how it might fit.
- Size: Larger pumpkins are easier to carve, especially if you’re doing intricate designs. Smaller pumpkins are cute for simple or multiple decorations.
- Texture: Look for a pumpkin with a smooth surface and minimal blemishes. Rough, bumpy areas can make detailed carving difficult.
2. Gather the Right Tools
Using the proper tools can make a big difference in the ease and quality of your carving:
- Pumpkin carving kit: These are specifically designed with safer, serrated blades and come with a variety of tools to help you carve, poke holes, and scoop seeds.
- Scoop or spoon: A large metal spoon or scoop will help you efficiently remove seeds and stringy pulp.
- Small, sharp knife: If you don’t have a carving kit, use a small, sharp knife for precision work and a larger serrated knife for cutting off the top.
- Markers or stencils: Outline your design on the pumpkin using a marker or stencil to serve as a guide for your cuts.
3. Cut from the Bottom
Instead of cutting a lid from the top of the pumpkin, try cutting a hole at the bottom:
- Stability: This method helps maintain the structural integrity of the top and prevents the stem from wilting.
- Easier lighting: It’s also easier to place your candle or light inside without having to reach down through the top.
4. Scoop it Out Well
Once you’ve cut your access point, it’s time to clean out the inside:
- Thoroughly scrape the walls: Remove all seeds and strings, and scrape the pumpkin’s walls down to about 1 inch thick for easier carving.
- Roast the seeds: Don’t forget to save the seeds for roasting! Toss them with oil and seasoning, then roast for a delicious fall snack.
5. Pick a Design or Stencil
Choose a design that fits your skill level and style:
- Simple Faces: If you’re a beginner, classic jack-o’-lantern faces with triangle eyes and a jagged smile are fun and timeless.
- Detailed Stencils: More experienced carvers can find stencils online to create intricate designs like haunted houses, witches, or spooky scenes.
- Personalization: You can also carve your initials, favorite movie characters, or any design that feels special to you.
6. Carve Carefully
Now for the fun part—carving! Here are some tips for smooth, safe carving:
- Start small: Always carve from the inside of your design out. Start with the smaller details, then move on to the larger sections.
- Go slow: Take your time, especially around corners and curves, to avoid mistakes or cutting yourself.
- Use toothpicks for repairs: If you make a mistake or cut off a part of the design by accident, use toothpicks to reattach pieces.
7. Light It Up
Once you’ve finished carving, it’s time to make your pumpkin glow:
- LED lights: LED candles or battery-operated lights are safer and last longer than traditional candles. They also reduce the risk of fire.
- Tea lights: If you prefer traditional candles, use small tea lights to keep the pumpkin from overheating. Always practice safety when using real flames.
- Glow sticks: For a unique effect, place glow sticks inside the pumpkin to give off an eerie, colorful light.
8. Preserve Your Pumpkin
To make your carved pumpkin last longer, follow these preservation tips:
- Soak in bleach water: Soak your carved pumpkin in a mixture of water and a tablespoon of bleach for a few hours to prevent mold.
- Moisturize: Apply petroleum jelly or vegetable oil to the cut edges to keep them from drying out and shriveling.
- Cool location: Keep your pumpkin in a cool, shaded area to avoid heat and sun damage, which can cause it to rot faster.
9. Creative Alternatives
For a twist on traditional pumpkin carving, try these creative ideas:
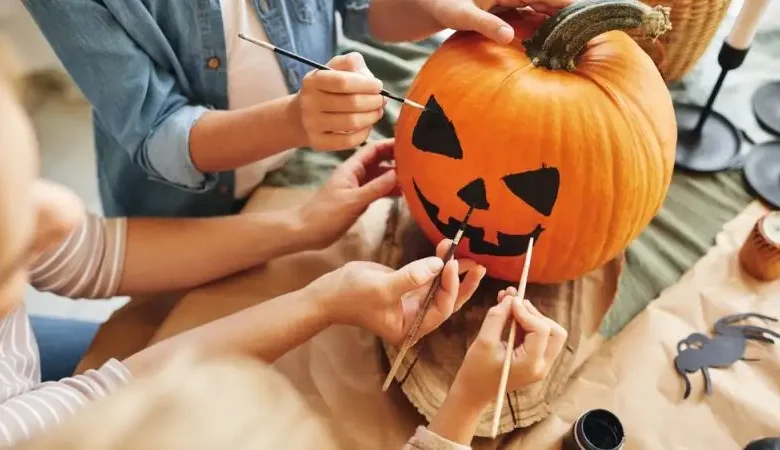
- Painted pumpkins: Instead of carving, paint your pumpkin with spooky or whimsical designs. This is especially great for younger kids.
- Drilled designs: Use a power drill to create intricate patterns of holes that allow light to shine through in unique ways.
- Etching: For a subtler look, use an etching technique where you scrape away the skin of the pumpkin without cutting all the way through.
10. Display Your Pumpkin
Finally, make sure your pumpkin gets the attention it deserves:
- Safe location: Place it in a spot where it can be admired, but where it’s also safe from pets or small children.
- Group pumpkins: If you’re carving multiple pumpkins, arrange them in clusters for maximum effect. You can also mix in other Halloween decorations like hay bales or spider webs.